Use cases
The un0rick-family hardware is a flexible platform for single-element ultrasound experiments. Below are the main applications people have built, along with setup details and example results.
Not sure where to start? Pulse-echo is the simplest and most common use case — if you can get a clean echo, everything else builds on top of it.
At a glance
| Use case | What it does | Difficulty | Board needed |
|---|---|---|---|
| Pulse-echo / A-mode | Send a pulse, receive the echo, measure time-of-flight | Beginner | Any (pic0rick recommended) |
| Non-destructive testing | Detect cracks, voids, and thickness in solid materials | Intermediate | Any (dual-element probe recommended) |
| Tomography | Reconstruct cross-sectional images from multiple angles | Intermediate | Any + rotation stage |
| Array imaging | Drive multiple transducers for synthetic aperture beamforming | Advanced | pic0rick + MUX PMOD |
| Transducer characterization | Evaluate probe frequency response, bandwidth, and sensitivity | Intermediate | Any |
| M5Stack platform | Arduino-connected standalone display | Intermediate | un0rick + M5Stack |
| DIY boards | Build your own custom acquisition hardware | Advanced | Custom |
Pulse-echo / A-mode
The fundamental use case. A single transducer sends an ultrasound pulse into a medium (water, tissue, metal) and listens for reflections. The time between the pulse and each echo tells you the distance to each reflective interface.
This is the starting point for all other use cases — if you can do pulse-echo, you can do everything else on this list.
What you get: A-mode waveforms showing amplitude vs. time (depth). With a servo or manual scanning, you can build B-mode (2D cross-section) images.
Recommended setup: pic0rick + any single-element probe in the 1–10 MHz range + a water tank or contact gel.
Non-destructive testing (NDT)
Use ultrasound to inspect solid materials without damaging them — detect internal cracks, voids, delaminations, or measure thickness. This is the most immediately practical application of the hardware outside of academia.

What you get: Reflection signals from internal defects or back-wall echoes. By measuring time-of-flight and knowing the speed of sound in the material, you can locate defects and measure thickness.
Recommended setup: pic0rick + dual-element NDT transducer (separate TX/RX paths) + couplant gel. Remove the TX/RX jumper on the board to enable separate paths.
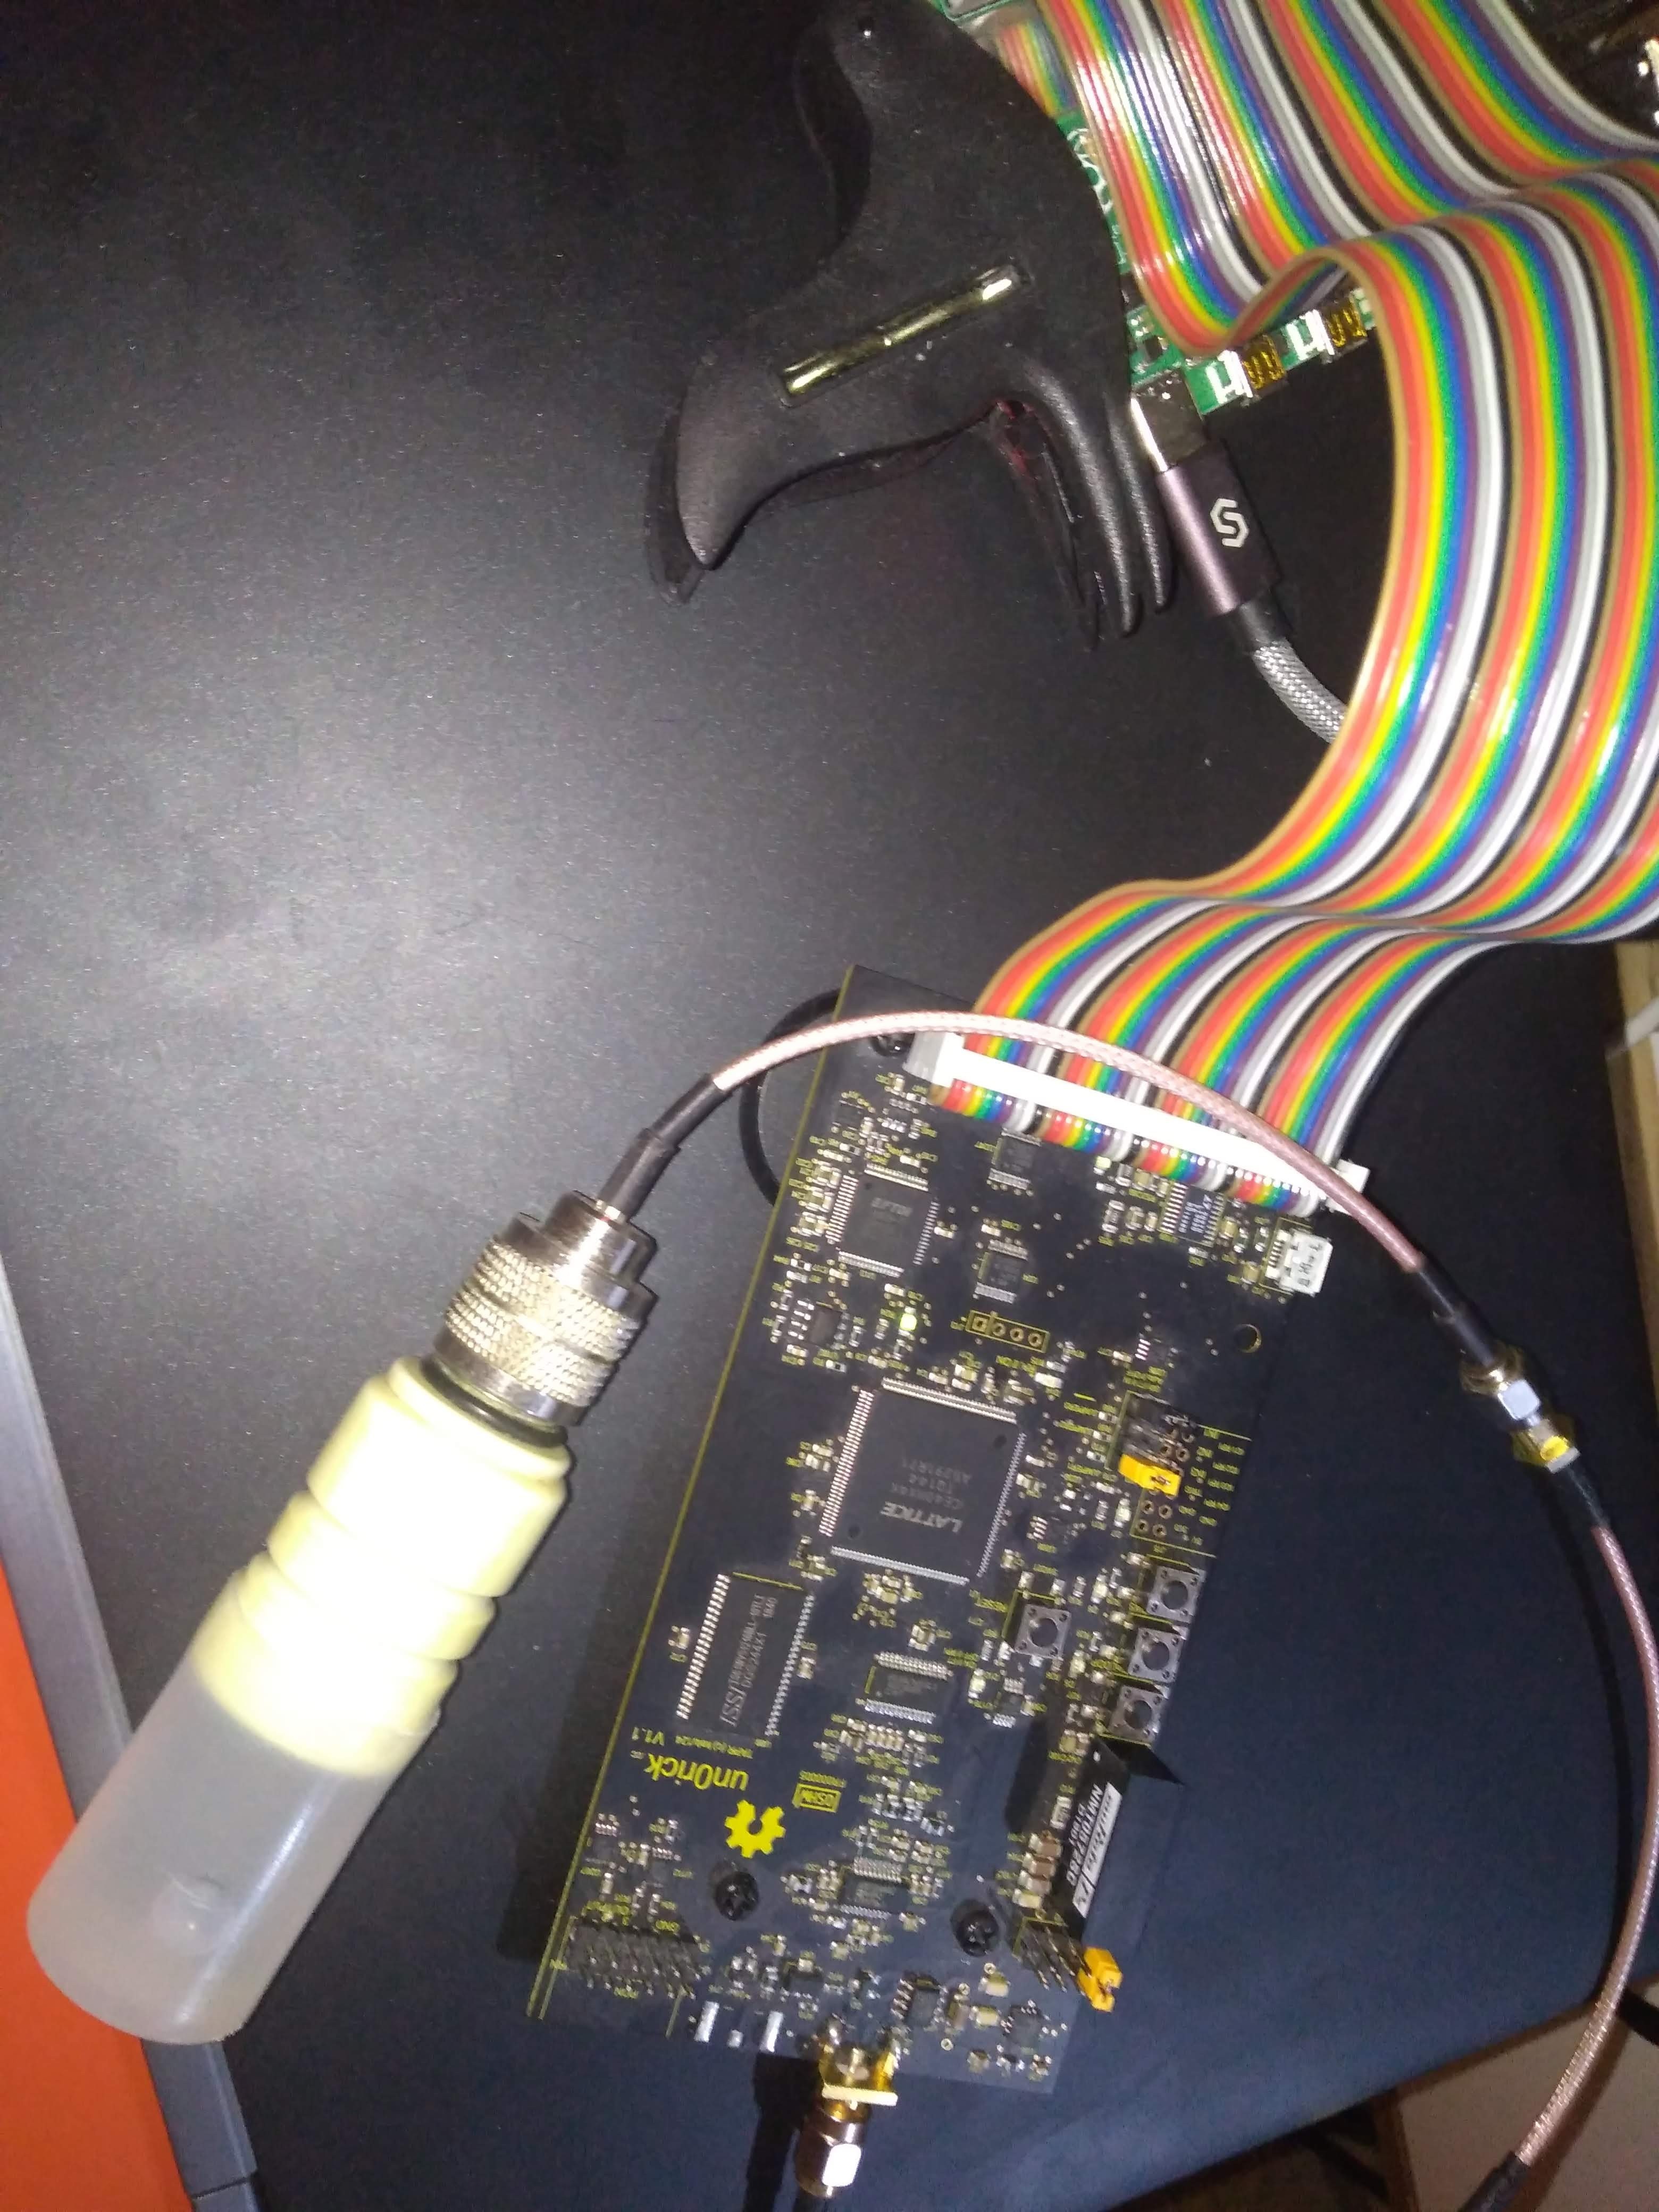
Tomography
Reconstruct cross-sectional images by acquiring pulse-echo data from multiple angles around a target. The transducer is fixed while the target rotates (or vice versa), and the image is reconstructed computationally after acquisition.
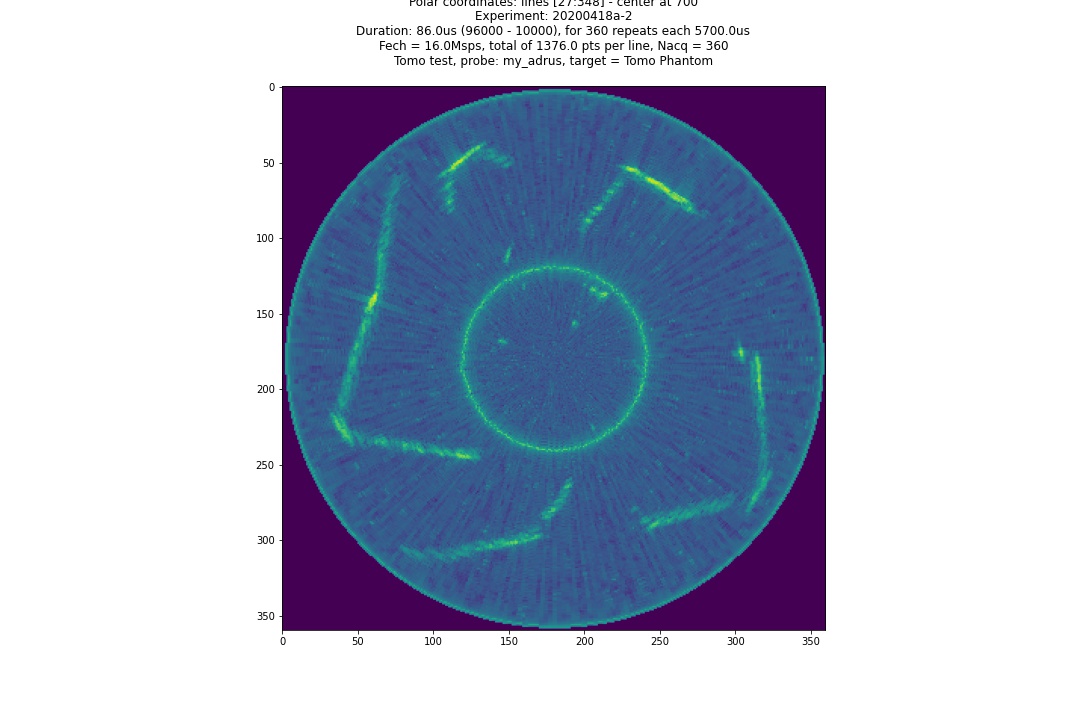
What you get: 2D cross-sectional images of internal structure — similar in concept to a CT scan, but using ultrasound.
Recommended setup: Any un0rick-family board + single-element probe + a rotation stage (stepper motor or manual turntable) + water tank with the target immersed.
Array imaging
Drive multiple transducer elements sequentially using the MUX PMOD extension board. This enables synthetic aperture imaging and basic beamforming with small linear or annular arrays.
What you get: Multi-element acquisition data that can be processed into focused images using delay-and-sum or other beamforming algorithms.
Recommended setup: pic0rick + MUX PMOD extension + a multi-element transducer array (up to 8 elements with separate TX/RX, or up to 16 elements with shared TX/RX path).
Note: This is an advanced use case. Start with single-element pulse-echo first to validate your setup before moving to array configurations.
Transducer characterization
Use the pic0rick as a test bench to evaluate transducer performance — measure center frequency, bandwidth, sensitivity, and beam profile. Useful for incoming quality control of probes, comparing transducers, or validating repairs.
What you get: Frequency spectrum (via FFT of the echo signal), impulse response, and relative sensitivity measurements.
Recommended setup: pic0rick + the transducer under test + a flat reflector in a water tank at a known distance. Compare the FFT of the echo against the transducer’s rated specifications.
See also: Compatible probes for a list of transducers that have been tested with the hardware.
Other setups
M5Stack platform
The un0rick board can be connected to an M5Stack for a portable, standalone display. The M5Stack communicates with the board over SPI and displays A-mode waveforms on its built-in screen.
DIY boards
If you want to build your own custom acquisition hardware based on the un0rick architecture, the design files are fully open source. Several community members have built derivative boards for specialized applications.
Which board for which use case?
| Use case | pic0rick | un0rick (FPGA) | lit3rick | lit3-32 |
|---|---|---|---|---|
| Pulse-echo | Best choice | Works well | Works well | Works well |
| NDT | Good | Good | Good | Best for weak signals (92 dB gain) |
| Tomography | Good | Good | Good | Good |
| Array imaging | Best (MUX PMOD) | Possible with custom wiring | Limited | Limited |
| Probe testing | Good | Good | Good | Best for sensitivity comparison |
| Standalone display | VGA PMOD | Possible | Requires RPi | Requires RPi |
Related resources
- Getting started guide — set up your pic0rick from scratch
- Compatible probes — transducers tested with the hardware
- Research papers — academic publications using these setups
- Community — ask questions and share results